NEWS
A Complete Guide on How to Install a Solar Panel at Home
Writer:Kaysen
1. Set Up the Scaffolding
Scaffolding needs to be set up before installing the solar system. This step takes up the
most time to build, usually about an entire day
These are required for the safety of the ones installing the panels.
If you’re not installing your solar panel system onto the roof, setting up any safety measures
may take less time.
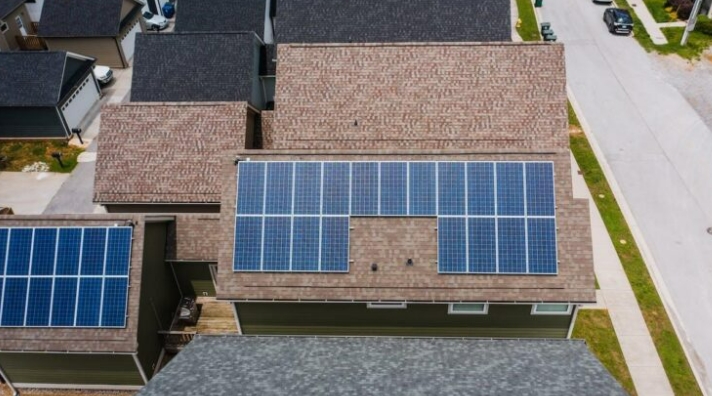
2. Install the Solar Panel Mounts
Once all safety measures are in place, it’s time to install the solar panel mounting system.
This will hold your panels in place and provide a stable foundation for your solar system.
You’ll have to lift your roof tiles to install your mounting system onto the rafters of your
loft. It must be tilted between 18 and 36 degrees so the solar PV panels can collect direct sunlight.
3. Mount the Solar Panels
Next, install the solar panels onto the mounting structure. Before securing them,
position or tilt them properly to maximise the sun’s energy they can receive and absorb.
Ensure that you tighten all the bolts to keep the panels in place.
4. Secure the Electrical Wiring
The next step is setting up the electrical wiring, which can vary depending on the
model. The most common are the MC4 connectors, which are compatible with most panels.
Most panels come pre-wired from the manufacturer for easier installation. However,
it’s still best to have this step performed by a professional electrician.
SAFETY TIP: Ensure your household’s electricity is switched off before working on this step.
5. Connect the Solar Inverter
The solar inverter is installed near the main panel. It’s best not to mount this on the
roof since it’s supposed to be located in a cool place without sunlight.
This part of the installation process can take about 4-6 hours, depending on the
complexity of your solar panels.
It’s important to set this up properly because the direct current (DC) electricity will
be converted to alternating current (AC) electricity.
Any system failures can cause fires and easily invalidate your home insurance
You can connect a generator meter to track how much electricity you generate daily
with your solar panels.
6. Bond the Inverter to the Solar Battery
Then, you have to connect your solar inverter to the consumer unit to generate electricity.
Solar batteries can be considered as an extra cost by some people. It helps store
excess energy and keep your home powered even
when your whole system is affected by cloudy days.
Once everything is connected to the consumer unit and grid input, you can check
the connected generation meter for its performance.
You can also use a computer to verify that your panels collect enough energy
to power your home.
7. Test the Newly Installed Solar Panels
The installation process isn’t complete until you’ve tested the panels.
Switch the power back on and monitor each part. Ensure everything works and is
properly producing energy.
CATEGORIES
CONTACT US
Phone: +86-13799269357
Tel: +86-13799269357
Email: info@kaysensolar.com
Addr: Building No.2, Jimei Xinglin Bay Operations Center, Xiamen,China.